Final major project completed for exhibition.

I had to hang up the rest of the fabric I purchased from York Market with the paper clip. and blackout the windows again using gaffer tape before I could setup my sculpture.

First of all we tried to see what the sculptures would look like in the main exhibition space and used some spotlights on it although it looked good I felt that the blacked out room would look better.

I also experimented further using my original sculpture’s in the space on a plinth. They looked good but I still wanted to try my larger sculptures.

I then moved the sculptures into the blacked out room I placed them on a black piece of material I had left over and then I felt they needed some height so I used the plinth and placed it on its side with the fabric.

I then had to find a way to secure the piece because although it stood up it couldn’t be left as it had fallen and it wouldn’t be a good idea to leave it to fall mid exhibition.

I approached Ollie who gave me a stapler but because of the weight and thickness of some of the wire the staples wouldn’t work. It was suggested that screws would work but I really didn’t want to use screws that could be seen and I felt they would be seen, so Ollie found some black screws that against the black fabric covered plinth couldn’t be seen so I was really happy with that. To further stabilise the sculpture I used fishing wire and paperclips securing from the top of the sculpture’s to the ceiling.  I am really happy with it so far but just have to wait in hope that everything is ok with the audio and visual projection.

I visited my exhibition piece on the day of the exhibition and the Audio had been set up and I was really happy with it but I felt their was still something lacking. I was mostly disappointed with the way the projector would not reach all of the sculpture and there was no way of enlarging it or moving it further back.

I went to see Brian I thought perhaps I could use a  second projector and project the same image underneath. ”Twin projections onto Twin sculptures’. Brian wasn’t sure this could be done and said he would bring another projector over to see if we can get a larger image onto the sculpture. I was disappointed but was pleased that there maybe another solution.  Brian came over and had decided to try to link the two projectors together as he realised that there is an output socket on the projector but couldn’t guarantee it would work as he had never done it before.  Lucky for me it did work and I was over the moon with the result.

I am so happy with what I have achieved for my FMP I don’t think I could have done anymore.


Update work plan 12/6/17

  5/6/17


3/6/17


4/6/17

5/6/17


10/6/17


12/6/17


13/6/17


14/6/17

Assessment Unit 7 Submit work. Hang Exhibition

Submit blog link, submission pack (including authentication form, work plan, proposal, evaluation and bibliography)

Purchase materials for exhibition space.

Print off Assessment package

Organise exhibition shop finish exhibition space.

Saturday club masterclass with Charles Hadcock.

Finish exhibition space, meet with Tutors to talk about what I am exhibiting and where.

Problem solve unsteady sculpture’s.

Fad Media Viewing at 1.30pm


Gaffer Tape and Black Material.

  17/6/17


19/6/17

London Trip with Saturday club for their exhibition.

Set up projector and Audio when it arrives.


  21/6/17 Opening Night. Exhibition Private View 21/6/17 Stays open for 2 weeks. Possibly work in the FAD shop.


26/6/17 –

22/7/17


Await a date for Assessment results

And come in to receive them.


Bibliography and Work plan updated

BIBLIOGRAPHY


London artists quarter. (2013). Biography. Available: http://londonsartistquarter.org/artist-hub/users/chloe-ostmo/profile . Last accessed 18/04/2017.

Chloe Ostmo. (not known). Biography. Available: http://www.chloeostmo.com . Last accessed 18/04/2017.

Not Known. (not known). Falling. Available: http://chloeostmo.com/falling.html Last accessed 18/04/17.

Chloe Ostmo. (not known). Biography. Available: http://www.artnet.com/artists/annette-messager/biography . Last accessed 18/04/2017

Tate. (not known). Biography. Available: http://www.tate.org.uk/art/artists/annette-messager-2670. Last accessed 18/04/2017.

Curated by Anna Dusi and Marisa Caichiolo. (2013). “UNSPEAKABLE” a solo Exhibition by Jessica De Muro . Available: https://www.absolutearts.com/artsnews/2013/05/09/artspublish/2348918314.html. Last accessed 18/04/2017.

Marianne Hirsch. Family Frames: Photography, Narrative and Postmemory. Cambridge: 1997.

Not Known. (not known). Absence and presence: Naro Snackey’s Photographic Sculptures . Available: http://photoclec.dmu.ac.uk/content/absence-and-presence-naro-snackey’s-photographic-sculptures . Last accessed 18/04/2017.

Cyril Foiret. (2011). Layer Motives by Nobuhiro Nakanishi January 31, 2011 by Cyril Foiret . Available: http://trendland.com/layer-motives-by-nobuhiro-nakanishi/ . Last accessed 18/04/2017.

Not Known. (2011). Biography. Available: http://trendland.com/layer-motives-by-nobuhiro-nakanishi/ . Last accessed 18/04/2017.

Not Known. (not known). Inverted space molecules. Available: http://www.bigertbergstrom.com/inverted-space-molecules. Last accessed 18/04/2017.

James Gilbraith (2014). Terminal Chancer Silver seasons Atlantic Salmon. Great Britain: The Guild of Reason1-170. 1-170.

James Gilbraith. (2014). Terminal Chancer Silver seasons Atlantic Salmon. Available: https://terminalchancer.co.uk/. Last accessed 06/03/2017.

Tony Oursler. (). Tony Oursler. Available: http://tonyoursler.com/. Last accessed 13/03/2017

Reserve channel. (1 may 2014). Tony Oursler Art in Progress. Available: https://www.youtube.com/watch?v=o-q15Qf-Q64. Last accessed 13/03/2017.

Not Known. (not known). Biography. Available: http://www.rogallery.com/Oursler_Tony/oursler-bio.html . Last accessed 18/04/2017.


artnet. (). James Welling. Available: http://www.artnet.com/artists/james-welling/. Last accessed 20/03/2017.

This content was originally written in association with the exhibition ‘Diane Arbus, Revelations’, on display at the V&A South Kensington from 13 October 2005 – 15 January 2006. . (3 oct 2005). Biography. Available: http://www.vam.ac.uk/content/articles/d/diane-arbus/ . Last accessed 18/04/2017.

not Known . (2014). Biography. Available: http://www.biography.com/people/diane-arbus-9187461. Last accessed 18/04/2017.

Raynal Pellicer (2010). Photobooth The Art of Automatic Portrait. New york: Abrams. Susan Hiller 140-145.

Edited by Ann Gallagher (2011). Susan Hiller. London: Tate publishing. 1-191

Peter Clothier (1995). David Hockney Modern Masters: Abbeville. 1-127.

http://lagallerianazionale.com/en/mostra/time-is-out-of-joint/ Last accessed 18/04/17

David Zwirner. (not known). James welling Biography. Available: http://www.davidzwirner.com/artists/james-welling/biography/ . Last accessed 18/04/2017.

http://www.museivaticani.va/content/museivaticani/en.html Last accessed 18/04/17

http://numerocinqmagazine.com/2012/11/04/at-the-bottom-of-memory-video-installation-by-joanne-lyons-introduced-by-kim-aubrey/ Last accessed 18/04/17

http://www.artplacement.com/gallery/artists_results_byartist.php?lastname=Lyons Last accessed 18/04/17

Charles Hadcock. (not known). Biography. Available: http://charleshadcock.com/. Last accessed 18/04/2017. http://charleshadcock.com/bio/ Last accessed 18/04/17


https://www.youtube.com/watch?v=0z_-ofYzkqE Last accessed 18/04/17

https://www.youtube.com/watch?time_continue=95&v=z_QQA_mb1GA Last accessed 18/04/17

https://festivalofmaking.co.uk/bella-may-leonard-with-silentnight/ Last accessed 8/5/17

https://www.youtube.com/watch?v=Bb13p54gLWU Last accessed 18/05/17

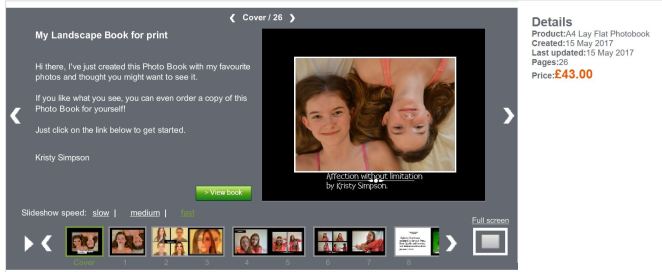
https://www.photobox.co.uk/shop/photo-books   Last accessed 18/05/17

https://www.youtube.com/watch?v=z_QQA_mb1GA Last accessed 25/04/17

https://www.youtube.com/watch?v=Bb13p54gLWU Last accessed 25/04/2017


Siobhan Dowd . (2017). Pipilotti Rist Swiss video installation artist. Available: https://www.britannica.com/biography/Pipilotti-Rist . Last accessed 18/04/2017.

https://artplinths.co.uk/shop/ Last accessed 22/05/17

https://youtu.be/XsLukIwc2fY Last accessed 22/05/17

https://uk.pinterest.com/oxfordchick5/presentation-plinths-and-display/ Last accessed 22/05/17

https://www.gov.uk/student-finance Last accessed 22/05/17

http://www.adobe.com/uk/creativecloud/buy/students.html Last accessed 22/05/2017


https://www.facebook.com/groups/139654156480551/ Last accessed 04/06/2017

https://uk.pinterest.com/ Last accessed 04/06/2017


Name__Kristy_Simpson___ CandidateNumber___123354____________

Project Action Plan and Timetable
Week Date Week

Beginning


Activity / What you are intending to do – including independent study Resources / What you will need to do it – including access to workshops


30/1/17 Introduction to Unit 7 – lecture

Pre proposal preparation

Pitch preparation

Review of work to date

13/2/17 Half Term – initial research

Preparation of pitch

20/2/17 Pitch

Write proposal

27/2/17 Submit proposal


6/3/17


13/3/17

Explore and experiment with Paper photo structures (influenced by David Hockney) and materials for block/cube photo sculpture.

Research photographic installation Artists for further ideas to explore.


Plan a Photoshoot with Paige and Taylor and take photographs.


13/3/17


14/3/17


Explore potential with photographs and Research projection and sculpture.


Update blog and Plan of action.


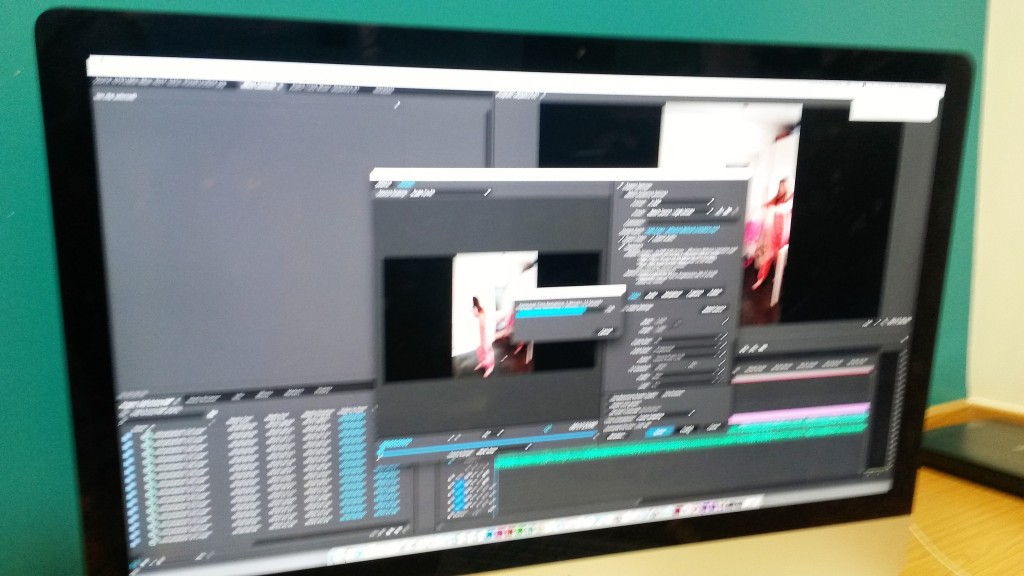
Explore Digital Manipulation and Layering of Photographs for potential projection onto structures.


20/3/17


21/3/17

23/3/17

Wire Drawings like David Oliviera

Update Blog and Plan of Action.


My full face casting.

Explore effect of wire drawings in projection.


Moved to 28th due to unforeseen circumstances.

27/3/17


28/3/17


29/3/17


30/3/17


1/4/17

Review Work plan and update blog.

Finish wire collaged cube for Projection.

Explore making cubes for projection and possible photo sculpture.

Planned exploration on the effects of Wire, drawing, cube structures and Projection in the dark room.


Further projection onto wire following a review of photographs and further manipulation of Photographs for Unique Effects.


Evaluate and reflect on Projection Research and Link in with Artist influences.


Put together a series of Questions around the Misconceptions about Twins that will best show their Personalities, Equalities and Diverse Relationship.


Location- Victoria building 1pm..

Projector, Jamie’s Mac, Drawing with hand print, Cubes, Photo cube and wire sculptures.


Put together some more manipulated photographs for Projection research and the Unique effects created on wire.

2/4/17 Video interview Paige and Taylor for Primary Resource material into their Perspective on the Relationship.

Take some more Photographs of the Twins for Potential work on Cubes.


Video record on Mobile Phone.


Print Photographs.

3/4/17


4/4/17


6/4/17


10/4/17


Choose a Photograph for the Exhibition Catalogue.


Tutorial with Kim. Target’s for

Assessment unit 7 Blog.


Experiment with Photographs on Cubes as Potential 3D sculpture idea.


Bring girls in to College for Moulds and Photoshoot.

Easter Holiday


Take original image to Mandy on USB stick for File to be sent for the catalogue.


Alginate and Plaster.

Photo studio.

17/4/17


Easter Holiday. Rome visit to Coliseum, Galleries and Vatican Museum etc..


Update Blog.


24/4/17


25/4/17


Message Jamie regarding assistance with Audio.


Tutorial with Kim about what I will need for the FMP Projection, sculpture and Audio Exhibition piece. Research Presentation methods for exhibition.

Update planner, Finish Blog Posts for Rome and School visit.

26/4/17


27/4/17


29/04/17


02/04/17

6/5/17

Draw around girls to initiate sculpture process and take measurements.

Start making Wire sculptures of Paige and Taylor.

Saturday club/ Casting. Cast Paige and Taylors Hands.

Photo box Photobook.

Saturday club at Festival of Making.

08/5/17


10/5/17


11/5/17


12/5/17


13/5/17


15/5/17


Update planner and Blog

Finish first wire sculpture and share photographs with tutor of Saturday club and Festival of Making photographs via Facebook.

Tutorial with Mandy on photo Book images and complete Top half of Wire sculpture. Volunteer for the Prism Gallery.


Tutorial with Kim checking blog progress and Make an appointment with Brian the Technician. For Video and Audio assistance for the 23/5/17. Update Planner and Blog posts.

Empty drawers and worktops of previous work ready for exhibition prep on Monday, Finish Taylor’s wire sculpture ready for Monday deadline.

Saturday club casting hands and red clay bowls.

Deadline final piece FMP


15/5/17


Hang Exhibition ( prep studio)

20/5/17

21/5/17

22/5/17

23/5/17

25/5/17

Saturday club.

Apply student finance for Degree

Receive Photobook Delivery.

Audio and Photo Video with Brian

Transform the Plaster room into exhibition space.


https://www.gov.uk/student-finance

USB memory stick

27/5/17


28/5/17

Spring Bank Holiday. Check blog, Bibliography, Work plan.

Saturday club.

5/6/17


3/6/17


4/6/17

5/6/17


10/6/17

Assessment Unit 7 Submit work. Hang Exhibition

Submit blog link, submission pack (including authentication form, work plan, proposal, evaluation and bibliography)

Purchase materials for exhibition space.

Print off Assessment package

Organise exhibition shop finish exhibition space.

Saturday club masterclass with Charles Hadcock.


Gaffer Tape and Black Material.

17/6/17 London Trip with Saturday club for their exhibition.


21/6/17 Opening Night. Exhibition Private View 21/6/17 Stays open for 2 weeks. Possibly work in the FAD shop.


26/6/17 –

22/7/17


Await a date for Assessment results

And come in to receive them.


Plinths

I have been researching presentation methods used by projection artists but haven’t really thought about the presentation of the wire sculpture and weather I will need to purchase a low stage like plinth. I have had a look at some of the websites that make them to have an idea of how much one may cost or to look at alternative ideas on Pinterest. I also need to find a way to display the photo book for people to look at.

Spruce Ply plinth 20H x 80W x 80D cm SALE

https://artplinths.co.uk/shop/


Updated work plan


15/5/17


Hang Exhibition ( prep studio)

 
  20/5/17

22/5/17

23/5/17

25/5/17

Saturday club.

Receive Photobook Delivery.

Audio and Photo Video with Brian

Transform the Plaster room into exhibition space.


USB memory stick

  27/5/17


28/5/17

Spring Bank Holiday. Check blog, Bibliography, Work plan.

Saturday club.

 
  5/6/17


5/6/17


10/6/17

Assessment Unit 7 Submit work. Hang Exhibition

Submit blog link, submission pack (including authentication form, work plan, proposal, evaluation and bibliography)

Organise exhibition shop finish exhibition space.

Saturday club masterclass with Charles Hadcock.


Gaffer Tape and Black Material.

  17/6/17 London Trip with Saturday club for their exhibition.


  21/6/17 Opening Night. Exhibition Private View 21/6/17 Stays open for 2 weeks. Possibly work in the FAD shop.


26/6/17 –

22/7/17


Await a date for Assessment results

And come in to receive them.


Preparing my exhibition space

Because I am hoping to project onto my wire sculptures as I did in my experimentation and need a dark space,  it was suggested that I have my own space in a room off the corridor for the greatest effect. I was given the Plaster room. Unfortunately this meant I have had to wait to be able to use the space as it was still being used by students all over college and the Saturday club. On the 25/5/17 I was finally allowed to transform the space into my exhibition space and this was going to be a difficult task. The room is full of equipment, dust, plaster and tables, with some help we stacked the tables and moved the furniture and plaster equipment to the sides and back of the room.  I then got on my hands and knees and broke the dried plaster with a hammer and scrubbed the dried plaster from the floor ready for the cleaners to use their polisher on the floor over the weekend.

because I want my room to be as dark as possible I blacked out the windows with cardboard and masking tape and was given some black Fabric to hang somehow and hide the stuff behind. I measured from floor to ceiling how long I would need the material.

Removing the ceiling tiles I had to find a way to hang the pieces of fabric. I thought I would try using paper clips as the fabric was easy to pierce.

When the fabric was put up next to each other it would separate so I used masking tape to hold it together. I don’t think this will be strong enough to hold it as the heat from the projector may cause it to unstick so I will need to purchase some Gaffer tape as this will be much stronger.

I need to purchase some more material. It was unfortunate that the Fabric only cut four lengths when I need six. The paper clips seemed to work so I am happy with that.

Audio and Video

I met with Brian the college technician at the editing suite at 10am so that we could go through the audio that I wanted to use for my FMP. The Video’s are stored on my You Tube channel. I had to sign in to you tube and then Brian used the You tube Link on a You tube Audio editor to down load them in to the Adobe Premiere Pro on the Mac computer in the suite. I explained how I wanted to capture Paige and Taylors point of view on what it is like to be Identical Twins but with my voice in it as little as possible so that it sounds like they are just talking about it rather than answering questions although this wasn’t always avoidable.

I have never seen or been involved in editing Audio or video before and it is something I wouldn’t mind knowing more about when I move on to my Degree although I am not technically minded and I do know from my research that lots of artists that use Media in their art work don’t necessarily do all the editing etc.. themselves and most will employ Technicians like Brian to do the work for them.  I directed Brian with every bit of the editing process and we cut the amount of Audio from Twenty nine minutes to 17 minutes. I wanted to use photographs that I had manipulated previously and had used before but also felt it was important to use the photographs of the girls when they were younger and from their photoshoots in the kitchen especially the Time lapsed Handstand that I based my wire sculpture on. I won’t know what the effect of using these photographs will be like in the exhibition space until it is all set up although I am prepared to make changes should I need to. I also want to explore further to see what it would look like using different lightbulbs in a spotlight including a red light and a black light.


Paige and Taylor, Wire sculptures.

I hope to recreate this Handstand as a wire sculpture.

firstly I drew around the girls on separate large pieces of paper and took some measurements. Using the drawings I begun to shape the outline of their form with the wire starting with the feet, hands, arms and Legs.

I then moved on to parts of the body like the hips, pelvis and buttocks.

and then the Torso and attached the Arms and legs and lastly the neck head and hair.

for the face I drew around the front of the girls face with her head side on for the silhouette and attempted to make the face but I didn’t like how it was turning out preferring the simplicity and imagining their faces are there, and so decided I liked the simplicity of the silhouette made form one piece of wire bent to shape like the drawing.

when I felt I had completed as much as I could on the first sculpture I then moved on to the next one.

Although I got the sculptures standing and they looked good I was disappointed that the Sculpture of Paige looked more like she was doing a headstand than a handstand so I wasn’t happy with it. I attempted to rectify this by strengthening the arms with more wire. I had a few problems along the way, while I was constructing the first sculpture I ran out of wire and so I had to wait for delivery of more wire. The wire that was delivered was slightly larger and heavier than the wire I had been using previous and it was really difficult to cut and twist. The bigger the sculptures became and the more wire was used and so the more difficult it was to spot weld. Some of the wire is twisted and knotted to add strength to the structure and keep it stable.

I believe that this was why the arms begun to bend and look like the sculpture of Paige was on her head also the knee’s of the standing sculpture Taylor begun to bend as well making her sculpture slightly shorter than she is in real life. I want their sculpture to look realistic in size so I decided to rectify all the problems by cutting off the legs and lengthening and strengthening them with the thicker wire.

I have done as much as I can at home and will need to make adjustments at college as I will need to transport them and find a way to make sure the sculptures are well balanced and won’t fall during the exhibition. I hope to have a low level plinth to stand them on but will see what it looks like when I have my exhibition space.


My Photobox Book

I thought as I had taken some lovely photographs and Manipulated some of them during my exploration and experimentation that I would put together a Photobook showing my journey towards my exhibition piece to exhibit for my FMP.

I came across https://www.photobox.co.uk/shop/photo-books

They had good reviews and the software appeared to be simple to use.

It sounded easy but unfortunately it was not as easy for me . I have had lots of trouble with some of the images as they were manipulated for screen and projection and not a great quality for print.  So after Three failed attempts of uploading the images to make the book I went to see Mandy who showed me how to change the images properly for print but explained that due to the Manipulation and size of some of the photographs it was unlikely that they would accept the quality for print in the size I was hoping for and if that was the case I could go and see her again.

I decided when some of the images failed that I would use the photographs that I hadn’t manipulated like the projections onto sculpture and the photoshoot of the girls for the larger images as they were all used in my Research and exploration. So I would create smaller boxes on the pages for the manipulated photographs to be accepted and this appeared to work for most of the images that I wanted to use. altogether There was only a couple of photographs I had to dismiss all together as they were manipulated photographs of projections on acetate and although they look beautiful on screen the system wouldn’t accept them for print as the quality wasn’t good enough.

Photobox book 1

To see the full photobook in Digital formation please click the link

http://www.photobox.co.uk/creation/4855920653